In order to best assist you and understand what the issue you are inquiring about is, we will sometimes request that you send us a screenshot.
Here are the instructions for taking a screenshot on a PC:
Quick tips:
- Pressing Alt + Print Screen will capture only the currently selected window. We recommend this approach so that you are only sharing the window you want us to see and not your whole desktop which may include private information.
- Another approach is to use the Print Screen key on your keyboard. Your keyboard’s Print Screen key copies your current screen. You can then paste it into image editing software with Ctrl + V. If you have multiple monitors, this method will create one wide image including all of your displays. the “Print Screen” (often shortened to “PrtScn”) key. It’s typically located in the upper-right corner of your keyboard and will take a screengrab of everything on all of your displays.
Here is a step by step guide on taking a screenshot on your PC:
- Capture the image — Use one of the steps above to capture the image you are trying to share with us.
-
Open Paint — type “Paint” into the Windows search bar and click the corresponding result.
This search is if you are using the latest version of Windows 10. If using Windows 7 and 8, you can find the Paint app in a few different ways, but both support the search tool which will find what you need straight away. - Paste the screenshot — Once Paint is open, click the “Paste” button in the upper-left corner of the program, or press “Ctrl” + “V” on the keyboard to paste your screenshot.
- Save the screenshot — Perform any edits you want and click the main “File” option in the upper-left corner, followed by “Save as.”
- Title the new file, choose a save location, and select your desired file format from the drop-down menu. For most purposes, JPG will do fine, but a variety of other formats are available to choose from such as PNG, BMP, GIF, and others. Click the gray “Save” button in the bottom-right corner when finished
Here are the instructions for taking a screenshot on an Apple computer:
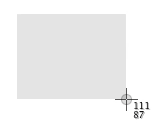
- Press Shift-Command(⌘) 4. ~ The pointer will change to a crosshair.
- Move the crosshair to where you want to start the screenshot, then drag to select an area.
While dragging, you can hold Shift, Option, or Spacebar to change the way the selection moves.
- When you've selected the area you want, release your mouse or trackpad button. To cancel, press the Esc (Escape) key before you release the button.
- Find the screenshot as a .png file on your desktop.
- Press Shift-Command-4. The pointer changes to a crosshair.
- Press the Spacebar. The pointer changes to a camera.
- Move the camera over a window to highlight it.
- Click your mouse or trackpad. To cancel, press the Esc (Escape) key before you click.
- Find the screenshot as a .png file on your desktop.
How to take a screenshot of your entire screen
Please beware that this will take a screenshot of everything that is on your screen, therefore you may want to close any windows with private information or use the option below instead.
- Press Shift-Command (⌘) 3.
- Find the screenshot as a .png file on your desktop.
